As I was checking my default settings after reading a post from Melissa at Silhouette School Blog on 10 Silhouette Studio defaults you can and should change, (I must say she is my go to for wanting or needing to know something about my Silhouette Cameo machine.)Ok so when I was checking my settings I noticed a setting that said cut to edge.

And knowing how I am (always gotta something) I thought I'm gonna see how this works, so I changed setting doing test and here I will show you how to cut to edge. Its saves a little bit of vinyl. It might not be much but I'm frugal with my vinyl so I will keep my cut to edge default checked.
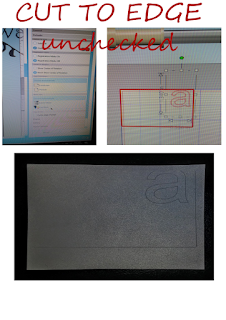
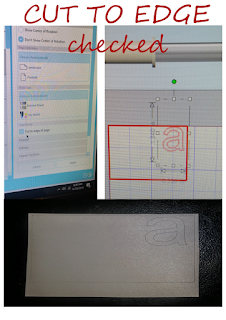
Here you can see the difference in CUT TO EDGE unchecked and with CUT TO EDGE checked.
Now we will see the side by side comparison. Cut to Edge checked, notice the one to the left you can see that it cut all away around and also cut the whole a out. I didn't move the placement of what I wanted to cut I just adjusted my default setting and to the right of the picture is with default Cut to Edge unchecked, you can see that it did not cut all the way to the edge of my vinyl, on the side or top and didn't cut the top of the a.

I like the idea that I can cut to edge of my mat. Well not edge of mat but to the edge of where you put the vinyl where the sticky part is located. It may not be for everyone but for me I like it this way. I don't have to worry that I have my design right in the cut area that I use to worry about, where it left a little unused vinyl.
If you want to change your setting to cut to edge go to the little wheel in the bottom right hand corner this is your settings. Next got to default and click CUT TO EDGE, make sure you hit apply as well or your changes will not take effect.
As always GOTTA HAVE PROJECTS.


No comments:
Post a Comment
Comments are always welcome.