Showing posts with label craft paper. Show all posts

Wednesday, January 6, 2016

Picture on Pallet with Tutorial

After seeing all these picture on pallet ideas going around I decided to make my first one. Love how it turned out.


For those of you who would like to DIY on a piece of pallet or really any kind of wood. Here is how I did mine.
Supplies

Piece of Pallet or any other kind of wood
A Picture
A spray clear sealer
Sand Paper
Mod Podge
Stain
Polycrylic or other such type sealer
A quote 
(I used my Silhouette Cameo and created one but you could buy or paint one on.)
Twine
Burlap (only need if making a burlap rose)
rag and Sponge brush ( or whatever works for you to apply Mod Podge)

First I got my picture ready by spraying the top with a clear sealer. I do this so when I apply the polycrylic it doesn't smudge my photograph. Let dry. 
Next prepare your piece of pallet. I sanded the best I could then stained it with a cloth and wiped off access.
Then put a layer of Mod Podge on your pallet where your picture will be placed. I then take the picture and put a light coat of Mod Podge on the back of the photo making sure you get the edges. Oh forgot I tore down the edges of my picture not necessary, I just like the worn look. Now place your photo where you wanted it and smooth out making sure to get out all the bubbles. Keep smoothing. Let dry. 
Now you are ready to apply the Polycrylic. Mine took several layers as I needed a smooth surface for my quote that I did in vinyl with my Silhouette Cameo. After your polycrylic is complete dry you are ready to add your quote and other embellishments.  I wrapped twine across the top and added a burlap rose. 

I will be making more of these pictures with pallets. Would like to see some of yours as well. 


Sunday, May 5, 2013

My Mod Podge Projects

Mod Podge is now one of my loves in crafting. There is so much, many crafts that you can do with this wonderful adhesive stuff. Sure glad I came across the brown paper bag floor craft. It opened a whole new world of crafting to me.
One of the best sites I came across is Mod Podge Rocks.I'm sure there are many more decoupaging sites out there that I will stumble upon in my crafting adventures.
So far here is what I've made with mod podge.


My best project so far!


Mod Podge comes in a variety of formulas:
Fabric, gloss, hard coat, matte, outdoor, satin, sparkle and dimensional magic. Pick your project, pick your formula. Get crafting!

Wednesday, February 13, 2013

Be Mine Valentine

Reading many blogs as I do everyday, I came across one last night with a Be Mine Valentine Wall Hanging. You can visit it here with a tutorial. I wanted to share with you the one I made.


 It is so cute and was super easy to do. Can be made to any size you would like. Probably even easy enough for a kid craft.  The be mine valentine only requires a few supplies.  And it doesn't take long to put together either.  I didn't however follow Crafts by Amanda directions or supplies exactly.  But for the most part I did.  She has many other tutorials on her site.
Supplies I used were:
Kraft paper
craft paint
craft wire
glue gun and glue
buttons
burlap and scrap material
the filling I used some flat fiber fill stuff not quite sure what its called but believe it is kinda some sort of batting.
black sharpie and a spray sealant


Hope you find this Be Mine Valentine wall hanging as easy to make as I did.


Tuesday, March 13, 2012

Craft paper Console Table

This is a console table that I have been wanting to redo for awhile. Loved the table but was not crazy about the flower or grape design on top. Doing my daily searching around the net for different craft ideas I came across The Ultimate Bag Flooring Guide
Which you can also use craft paper for the flooring I found in my searches. I loved the look of it but was too big of a project for me to try at first. I had seen some pictures of the brown bag idea being done on a stole and other table tops so I thought this is perfect for this table. And of course for my first try at it.

So I took this table and with a little time and patience I turned it into something I absolutely love.


  • Black paint or your choice of color
  • sand paper to get off rough edges and loose paint
  • sand paper for fine sanding scuffing
  • mod podge
  • brown paper bag or craft paper torn into pieces 
  • polyurethane (gloss)
  • sponge brush or your fingers like I used for gluing the paper
  • trim brush or your choice of brush for painting
  • sponge brushes for applying poly
  • your choice of main paint for base
  • some wood stain (I used red mahogany)
  • time and patience
 First I lightly sanded any loose paint. Then I applied one coat of black paint. Oh actually I first laid out how much paper I would need by laying the sheets across my table. Then I tore up and crumbled my craft paper. Then painted the top. I only did one layer because of it being covered with the crumbled craft paper.


0307121109a

0309120914
I then spread mod podge on the table working in small sections. Laying the craft paper on the glue and smoothing out any air bubbles and then applying a layer of mod podge on top of the paper with your sponge or like I did using my finger. It was easier for me to use my fingers but mind you it gets very messy using your fingers. Just worked better for me that way. Do what works for you. Then you just keep adding the paper overlapping some or putting close to the edge of each torn crumbled paper piece or leave a small gap to allow some of the bottom color to show through like I did in some spots. I also applied some wood stain after paper and glue were dry to make some of the wrinkles show more. Apply stain as directed on container.
0309121423
When it was all dry I took some fine sandpaper and scuffed the top of the console and smoothed off any rough pieces of paper.
Lastly I took a sponge and applied a thin even layer of polyurethane to the top and sides of the top. Let dry overnight. Lightly scuffed and added another layer of poly. Let dry again. Added last layer just for extra durability.
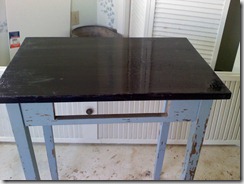
My final step was to paint the rest of the table I chose a light blue color giving it two layers of paint. Hope you enjoy the looks of this Craft paper console table as much as I do.


I ended up re doing this table painting the base black and sanding the edges of it. The light blue color was just not really me. 
A little more rustic is my style.

brown paper bag, console table, rustic table, brown bag technique


Featured Post

Picture on Pallet with Tutorial

After seeing all these picture on pallet ideas going around I decided to make my first one. Love how it turned out. For those o...