Showing posts with label Crafty. Show all posts

Wednesday, January 6, 2016

Picture on Pallet with Tutorial

After seeing all these picture on pallet ideas going around I decided to make my first one. Love how it turned out.


For those of you who would like to DIY on a piece of pallet or really any kind of wood. Here is how I did mine.
Supplies

Piece of Pallet or any other kind of wood
A Picture
A spray clear sealer
Sand Paper
Mod Podge
Stain
Polycrylic or other such type sealer
A quote 
(I used my Silhouette Cameo and created one but you could buy or paint one on.)
Twine
Burlap (only need if making a burlap rose)
rag and Sponge brush ( or whatever works for you to apply Mod Podge)

First I got my picture ready by spraying the top with a clear sealer. I do this so when I apply the polycrylic it doesn't smudge my photograph. Let dry. 
Next prepare your piece of pallet. I sanded the best I could then stained it with a cloth and wiped off access.
Then put a layer of Mod Podge on your pallet where your picture will be placed. I then take the picture and put a light coat of Mod Podge on the back of the photo making sure you get the edges. Oh forgot I tore down the edges of my picture not necessary, I just like the worn look. Now place your photo where you wanted it and smooth out making sure to get out all the bubbles. Keep smoothing. Let dry. 
Now you are ready to apply the Polycrylic. Mine took several layers as I needed a smooth surface for my quote that I did in vinyl with my Silhouette Cameo. After your polycrylic is complete dry you are ready to add your quote and other embellishments.  I wrapped twine across the top and added a burlap rose. 

I will be making more of these pictures with pallets. Would like to see some of yours as well. 


Sunday, October 5, 2014

Toilet Paper Roll Candles

Candle made from Toilet Paper Roll
I did not make this Toilet Paper Candle and these are not my instructions but I am giving credit to the one who did.  See below I hope she doesn't mind that I put this out to the world to share.  I don't know if she even has a website or blog as I got the information from one of my Facebook groups.  They are so many talented people out there with so much talent.  This is one project that I have tried but have come to realize that wax and me just don't mix to well.  I have tried several projects with candle wax beginning to think it just doesn't like me.  The directions are easy enough for anyone to follow so I thought I would share with others that might not have a problem working with wax.

So now for the instructions
What you need
Roll of Toilet Paper
Black or White or Tan Spray Paint (depending on light or dark candle)
Paraffin Wax
Double boiler or can  that can sit in a pot or crock pot (she uses regular pot)
Fragrance (spices or oils)
Coloring from (colored candles, crayons, food coloring, etc..)
Tongs
Wax paper
Electric Tea light
Elmer's Glue or Mod Podge
other embellishments (oats cinnamon, cloves, etc..)

Spray paint your tp with flat paint and let dry,  I use black spray paint for dark colors and white/tan for light colors..
Melt your wax or paraffin. I use a regular pot and I set on a bit above low.  Some ppl use crock pots or double boilers. At this time you can add your fragrance (spices or oils) and colors (colored candles, crayons, food coloring, etc).
When the wax is completely melted use some tool (I use tongs) to hold your toilet paper and dip your tp roll into the wax to add a thin coat of wax on it. Set it on a plate, wax paper or paper plate.
Let it cool.
At this time you can add a label or picture to the candle.  Simply glue it on.
Now you have to decide the look of the candle you want to make.  If you want a smooth candle, spoon the wax onto the candle and smooth it out. If you want a frothy candle continue on. Let the wax cool until it begins to form a crust.  Then skim a spoon across the top of the wax and transfer that to your candle.  If you have a label, be sure to put the wax around the label first. Then keep spooning until the candle is covered.
You may have to reheat the wax and let it cool again to finish.
Cover your tea light, too. Don't cover the bottom of the tea light. Let it all cool.
Then decorate. You can add oats, cinnamon, cloves.. well, anything you want to your candle. Just use Elmer's (some use mod podge, but Elmer's is cheaper... a lot!!).
To protect my candles I put a coat of Elmer's glue and water (half and half) all over everything except material. However, if you put this mix on material, it will stiffen it, so it's up to you.
Your candle is ready to be plated. Burn away! Well not really burn but turned on.

Hope you enjoyed her instructions


Picture and instructions are by Diana Hammond please do not use as your own. Give credit where credit is due.

Wednesday, July 9, 2014

Tobacco Stick Shutter Projects and a Few other Tobacco Stick Projects

Shutter projects from tobacco sticks and a few other tobacco stick projects I've done. Very easy and simple to do.
My husband started making these unfinished shutters to sell. They are 6 in x 24 in.  


When I seen them I starting thinking about what I could do with them. So I grabbed myself 2 unfinished ones and went to work. I made myself a set of shutters with crows stenciled on for my bathroom. Our bathroom mirror was just so plain looking, which so is the whole bathroom, not really decorated the way I want yet. Anyway above my sink is just a flat large mirror on the wall. Plain Jane, (YUCK).  But after painting two of the shutters Brick Dust Red and stenciled a black crow and stars on it now not so plain.

Before hanging them


After I hung. (Don't mind the rest of what you see, as I said bathroom not done yet)

 Americana with Old Glory handwritten on and a metal star with pip berries.
Using same unfinished tobacco stick shutters he made I painted this Americana Shutter. Adding my metal star and pip berries gluing on with E6000 glue.   Got this idea from a smaller one I seen on Pinterest.


Basically same concept as my Old Glory shutter but this time stenciled on America and added a raffia bow.


This shutter is just painted black with a star in middle. For the star used a stencil I made from contact paper and dry brushed my antique white paint on for a more worn look for the star. Then stapled pip berries across the top.


Flag drilling holes with a very small drill bit to attach my sticks together with wire. Twisting each section of wire to hold in place and then a hole also drilled in the top on both ends to attach twine for hanging.


Tobacco stick basket with twine handles


Welcome sign fence with pip berry wreath with metal star.


Grapevine and battery operated lights tied on to this tobacco stick ladder with some homespun material.


Decorative window from tobacco sticks. Simple looking, just some raffia and homespun bow.  An 
Old Glory sign made from a piece of scrape wood  and a grungy battery operated candle.


Tobacco stick ladder with homespun, a rusty metal star and some pip berries.


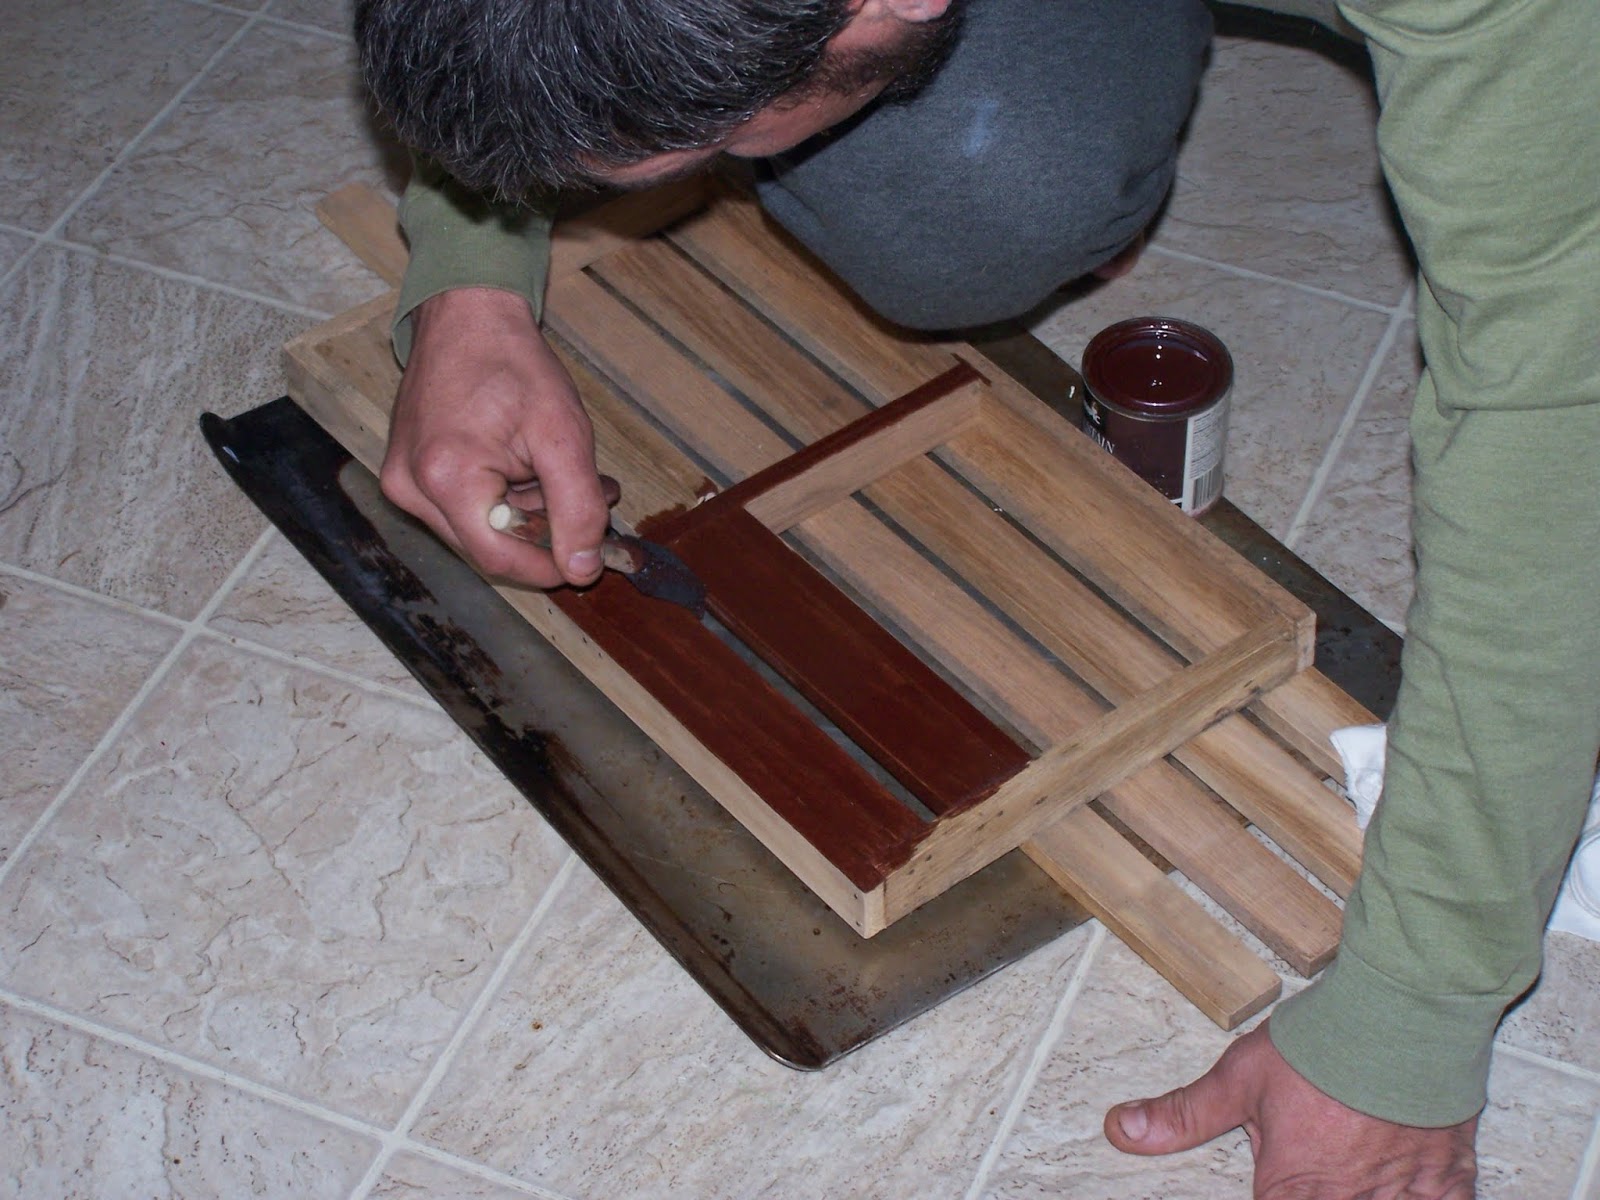
My hubby staining this trivet he made for the pans and silverware.  He
made this so our table wouldn't be affected from the heat from the pans.

                                                  Top view showing where the silverware go
                                   Front view with the pans and silverware in place on a table.
And this is the view with  the trivet hanging on the wall when not in use.  I added the homespun 
material to it for a more decorative look while it is hung up.

Hope everyone else loves my Tobacco Stick Shutter projects as much as I do.


Sunday, August 4, 2013

Grunge Mix using Oatmeal

I came up with this Grunge mix using Oatmeal by taking a little of this and a little of that from other recipes or from other crafty people's tips to make these neat looking candles, and my country bath jar.   Cans could also be used with this grunge mix using oatmeal.


My grunge mix I used for my candle and bathroom glass jar. Sorry kinda blurry

  1. some cinnamon
  2. instant coffee and ground vanilla coffee
  3. Epson salt
  4. oatmeal
  5. nutmeg
  6. a few cloves tops
  7. elmers glue
  8. bit of water 
  9. Line a shallow pan with foil or wax paper.


Some of my items to grunge I usually paint brown or black first. Depending on the item. For this project the glue mixed with paint works just as good plus serves two purposes.

Prepare your grunge mix by mixing together the first six ingredients in a bowl or whatever you would like. Set aside.
Then add just a bit of water to the Elmer's glue just to make a little thinner but not too runny. Then paint this on the glass jar.
For the candle I added brown paint to the glue and a bit of water. Adding the brown paint covers the color of base item, I like it that way much better. Brown paint is not need if you like some of the base color to show through.
Then spoon the grunge mix onto the item.
After dry i sprayed with sealant. you can also sprinkle little extra cinnamon or a bit more grunge mix. If you find some spots you would like extra on.
I recommend that If you do add any extra oatmeal grunge mix to spray again. With just more cinnamon you wouldn't need to spray again.
Some of the mixture still seems to want to fall off. So I'm gonna try my good old mod podge next time to seal. Then use spray again. I just like to have more protection.


.

 Experiment and have fun crafting

********Not by any means am I an expert or even claim to be close to one. I do all my crafts by trial and error and taking other peoples advice.
I do not burn candles so take caution if you burn them. I have no clue how the candles would burn with the mixture on them.

******After posting this I have learned you can not burn these types of candles.

Sunday, May 12, 2013

New Tradition-Kid's Hand print for Mother's Day

This grandmother is starting a new tradition with the grand kids for their mommy's on Mother's Day.
 I got the inspiration from Anna at mylifeandkids who was a special guest to post at Mod Podge Rocks.
Anna's post was
Mothers day craft for kids: handprint canvases 
She gives you all the direction for this project.  I used most of her methods but personalized my way and used a wood frame instead of canvas.
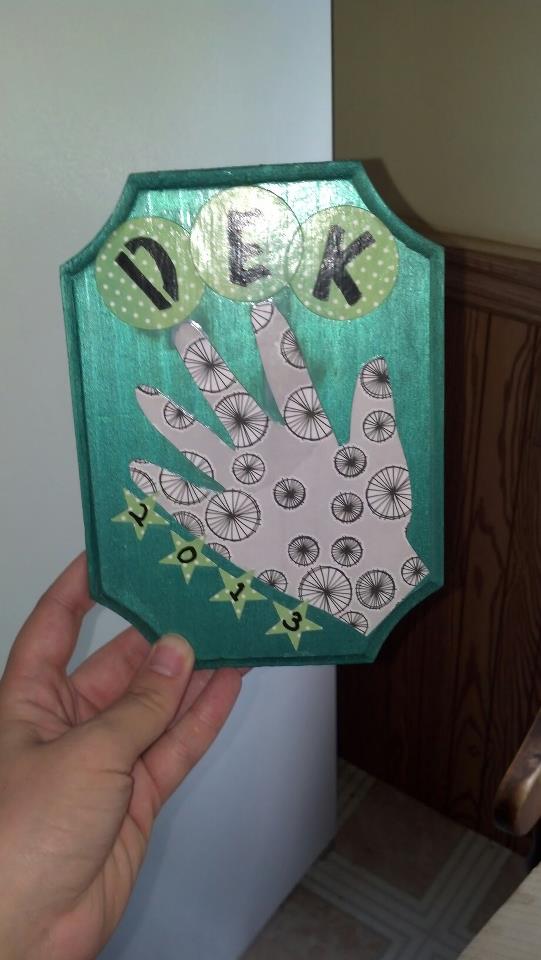
I made circles scrapbook paper using my fiskars circle punch for the name and star punch. Traced this lil man's hand on scrapbook paper. Painted my board. You really could you anything that the kids hand would fit on.  I prearranged where I wanted everything placed.  Once I figured it out I coated my board with Mod Podge then place everything in place.  Making sure all edges were on good and pressing on everything to get any air bubbles out. Let dry then coated 2 more times with the podge. Then hung a wall hanger on back to hang it up.
Here is my version of our new tradition of kid's hand prints for every Mother's Day from here on out.  Well at least until the kiddos have stopped growing. So that will be at least 16-18 more years.
grandson helping make his mommy's gift


Sunday, May 5, 2013

My Mod Podge Projects

Mod Podge is now one of my loves in crafting. There is so much, many crafts that you can do with this wonderful adhesive stuff. Sure glad I came across the brown paper bag floor craft. It opened a whole new world of crafting to me.
One of the best sites I came across is Mod Podge Rocks.I'm sure there are many more decoupaging sites out there that I will stumble upon in my crafting adventures.
So far here is what I've made with mod podge.


My best project so far!


Mod Podge comes in a variety of formulas:
Fabric, gloss, hard coat, matte, outdoor, satin, sparkle and dimensional magic. Pick your project, pick your formula. Get crafting!

How to make a Friendship Bracelet Tool and a Friendship Bracelet

How to make a homemade friendship bracelet tool and making a friendship bracelet video.  It is a great site for kids/teen crafts.  Some even adults will enjoy.  Basically something for everyone.  From simple to a little more difficult crafts.
 Simple Kids Crafts is a video blog that has a ton of crafts.  They also have a YouTube channel http://www.youtube.com/user/simplekidscrafts  I think they have over 500 tutorial videos. 
Be sure to go check this video blog out!!


Wednesday, February 13, 2013

Be Mine Valentine

Reading many blogs as I do everyday, I came across one last night with a Be Mine Valentine Wall Hanging. You can visit it here with a tutorial. I wanted to share with you the one I made.


 It is so cute and was super easy to do. Can be made to any size you would like. Probably even easy enough for a kid craft.  The be mine valentine only requires a few supplies.  And it doesn't take long to put together either.  I didn't however follow Crafts by Amanda directions or supplies exactly.  But for the most part I did.  She has many other tutorials on her site.
Supplies I used were:
Kraft paper
craft paint
craft wire
glue gun and glue
buttons
burlap and scrap material
the filling I used some flat fiber fill stuff not quite sure what its called but believe it is kinda some sort of batting.
black sharpie and a spray sealant


Hope you find this Be Mine Valentine wall hanging as easy to make as I did.


Monday, February 4, 2013

DYI Country/Rustic Wooden Spoons

Country/rustic is my decorating style. I can't really afford to pay the price of the things I would like to have decorating my home. Or my kids home which they all love that style as well.  So I'm always looking on the net or Pinterest looking for ideas to decorate our homes.  Recently I seen a site for wooden spoons and had to try the technique they said about.  I went to my uncles used store and he had some wooden spoons there for $.25 each and I picked up a few to do country/rustic style.

Got the wooden spoons home and anxious to start a new project and I pulled my paints out in four different colors trying to stick to the country/rustic colors. Reddish, indigo blue, black and not sure of the color name but in the greens. Then I started painting away.  After both sides were completely dry I took a rough piece of sandpaper and scuffed the edges a bit.  Trying to think of how they would naturally get worn.  Now my problem is I don't know what I want to put around them.  Or what to do with them. Tried tying a bit a fabric around them, also tried twine.  Seen somewhere that they were also just place in a mason jar or hung on wall.  Guess I'll figure it out.


wooden spoons, primitive decor, primitive spoons, material, painted spoons


One of the simply and least expensive crafts I've done. Another way to make my life a little Easier

Sunday, January 20, 2013

DIY Burlap S'mores Banner with Tutorial

Today I whipped up this cute Burlap S'mores Banner and provided a Tutorial for a craft pal of mine. She has s'mores parties and thought this sign would be great as a decoration.  She hasn't seen it yet but hope she loves it.


Crafting Supplies Needed for this Burlap S'mores Banner that was pretty easy to do.
Burlap
Lace
Stencils
Paint
Twine
Stitch Witchery

Sorry no pictures as I went along, I wasn't sure how it was gonna turn out. I showed my aunt and she suggested that I put it on here with a tutorial. 
So here is what I did.
Grabbed some burlap and laid my stencils spelling s'mores out on it to determine how big i needed to make the burlap pieces. Mine measured 5x7, I wanted extra on it to allow for folding over the twine.  I cut my burlap.  Then laid my stencil in place and dabbed the paint on the burlap. Let dry surprisingly it dried pretty quick so I was able to move on to the next steps fairly quick.
Take the lace and twine.  Measure the lace according to the width of the burlap.
Then take the stitch witchery and lay it on the edge of the burlap then place half of the lace on top of the that allowing the other half of the lace to hang over the top edge. 
Place damp rag on the lace and iron according to stitch witchery instructions.  You want to make sure you leave this extra overhang to add the twine. 
Next take the twine, (I did not cut my twine yet because I wasn't sure how much I was gonna need. But you could figure it out a head of time, I just didn't.), and lay it on your lace and right at the edge of the burlap. Place your stitch witchery same as you did to the other side.
Fold down the lace make sure that the twine is at the edge and not where the witchery will adhere to it. Do this process to all your burlap pieces. 
I left about a foot of twine at each end and left a loop for hanging.
Make your pieces any size or length you wish.  Determine by the size of your stencil and the look you are going for.
You could even cut into triangular pieces.
Hope you could follow along with my instructions for this pretty easy Burlap S'mores Banner.  If you have any questions feel free to ask.
 

Thursday, January 17, 2013

Chalkboard Spray Paint

Chalkboard Spray Paint by Krylon my new way to recycle some of the things I have around here that I was not really using anymore.  And of course finding new things to use the chalkboard paint on to give it an extra use.
I got one of the ideas from Simplicity in the south. She made a chalkboard gift for a teacher using a clipboard.  I like the saying she put on the chalkboard and the technique she used for adding the words.  She used Krylon flat paint with primer for her project whereas I used the Krylon Chalkboard Spray Paint.  She has many other DIY Projects on her site that I'm sure you will love.
I grab myself an old cookie sheet type pan.  Sprayed it with 3 coats of the chalkboard paint let each coat dry completely.  Then I printed out my Things to Remember saying to the size I wanted, taking a piece of chalk on its side and rubbing the back of my paper so I could use it to transfer my letters to the dried chalkboard that was just created.  Next took a pencil or pen and went over the letters transferring them to my chalkboard.  Now grab a paint pen in white and fill in those words.  Me being left handed I started from the right working backwards to paint my letters so my hand would rub in the wet letters. Let dry

Saturday, November 17, 2012

Easy Kids Christmas Ornament Wreath Craft

Last night my step son wanted to make a Christmas Ornament with glitter.  So I started thinking about different ornament crafts I've seen and remember one about using buttons. 
I got out some buttons, thin wire, the Mod Podge (of course I had to use this, one of my favorite craft supplies), the glitter (red and green), some cording or use whatever you want to use to hang your ornament.
String the buttons on the wire, make into shape of wreath, tie off by twisting the wire where the two ends meet. He then put Mod Podge all over the buttons. Oh yeah we used two bigger buttons at the top for glitter a different color. See the photo for difference.  He only applied the Mod Podge to the smaller buttons first.  Then out came green glitter and he started shaking away all over those buttons. Let dry. Reapply where needed. then he applied the glue to the larger buttons and got out the red glitter. 
After it was all dry husband then sprayed it with a sealer to help hold the glitter on just in case. Then we added the cording some leave things we had but you could put whatever you wanted on to decorate it.
There you have it an Easy Kids Christmas Ornament Wreath Craft.

Wednesday, September 26, 2012

Glittery Ornaments

Do you want to make some glittery ornaments this year? If so I found these easy to do glittery ornaments on the Sew Blessed blog. Clear ornaments,Pledge, glitter and a sharpie. How cute and easy. Check it out here.
Sew Blessed also has other great ideas too, be sure to check them out!

Monday, September 24, 2012

Lighted Canning Jar Pumpkin

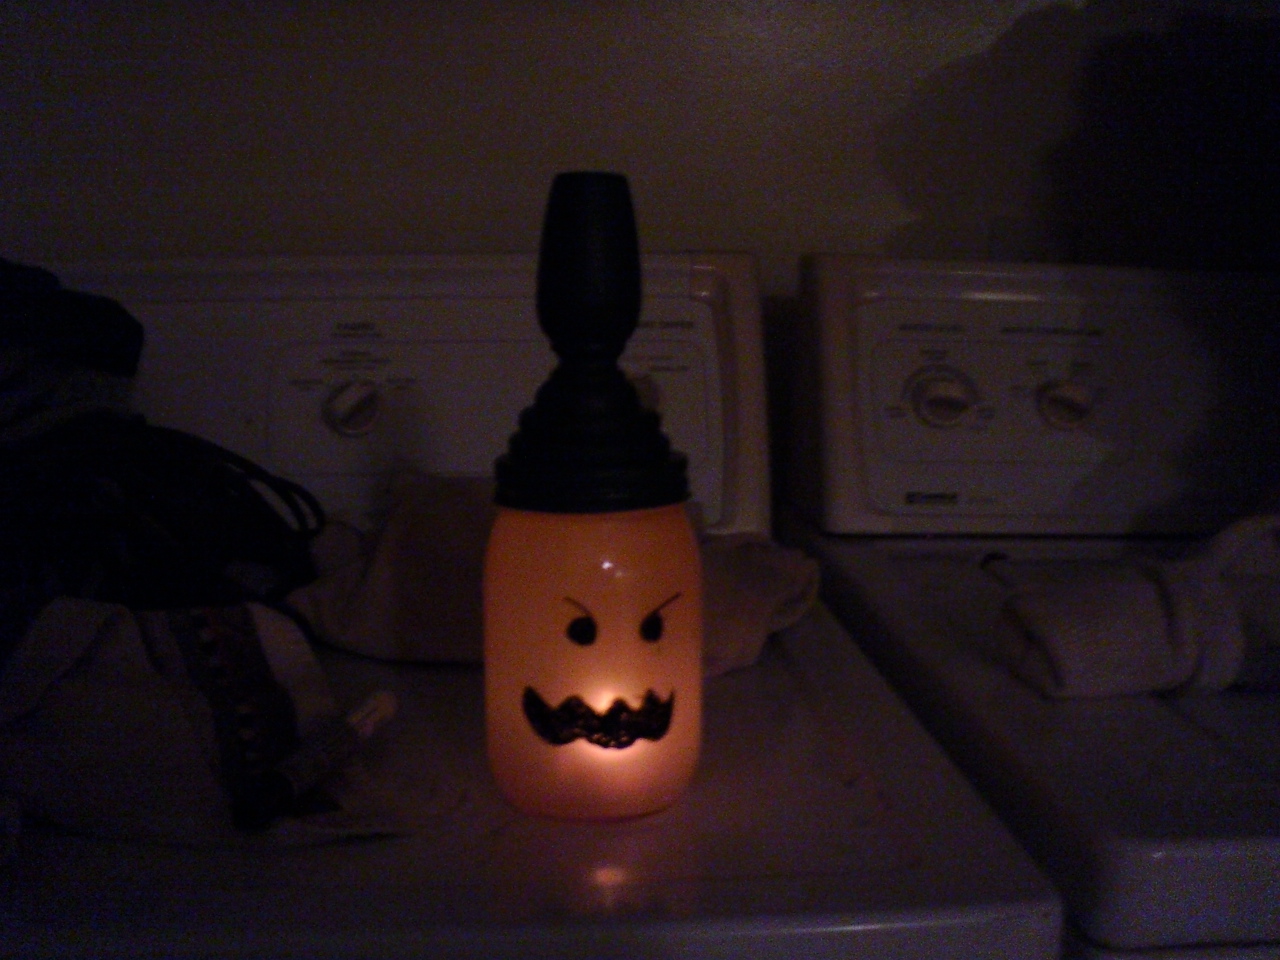
Being a little crafty this weekend with my granddaughter. I made a lighted canning jar pumpkin.  This project really took no time at all. Gathering  a canning jar and lid and a candle holder base,  and some paint I was of crafting.

I grabbed some pumpkin orange paint  added little water to it in a little bowl.  Dumped it into the canning jar, swirled it around covering all of the inside. Dumping remaining out and tipping my jar upside down to finish draining on some wax paper and let it dry. After drying added this cute lil face with permanent black marker. Painted lid and candle holder. Hot glued them together. added a battery operated tea light. Screw lid to jar and walla my lighted Canning Jar Pumpkin

Thursday, April 12, 2012

How to recycle those soup cans into a craft

 Here I found a great way to recycle your soup cans, coffee cans or any tin can that you might use into a craft. Cynthia Shaffer has a tutorial on making a tin can caddy.  Cynthia made this caddy for her craft supplies. What a great idea to recycle those soup cans.
 tin can caddy
Be sure to check out her site at http://cynthiashaffer.typepad.com/blog/2011/01/tin-can-caddy-tutorial.html

Featured Post

Picture on Pallet with Tutorial

After seeing all these picture on pallet ideas going around I decided to make my first one. Love how it turned out. For those o...